Jenkins
参考链接
Jenkins 是一个基于 Java 语言开发的持续构建工具平台,主要用于持续、自动的构建/部署你的软件。它可以执行你预先设定好的构建脚本,也可以和 Git 代码库做集成,实现自动触发和定时触发构建。
相关概念:
- DevOps:Development + Operations,强调开发与运维之间的协作流程;
- CI:Continuous Integration(持续集成),指源代码变更后自动检测、拉取、构建;
- CD:Continuous Deployment(持续部署), 指将构建后的产物发布到测试/生产环境;
安装指南
参考 Jenkins 的 《生命周期终止的操作系统》 和 《Java 支持策略》,我们优先采用 Ubuntu 操作系统和 Java17 环境。
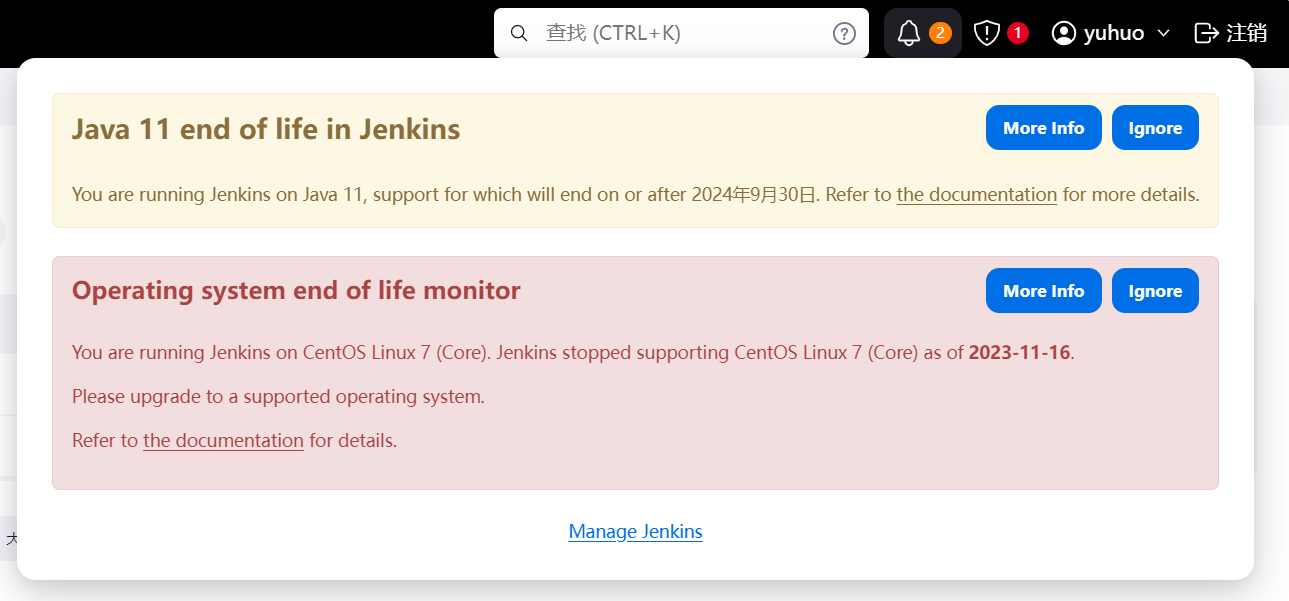
采用 CentOS7 和 Java11 目前也可以正常安装运行,但页面通知栏会有相关警告。

Ubuntu 安装 Jenkins
# 安装 java17
apt install -y openjdk-17-jdk
# 查看 java 版本
java -version

# 安装 net-tools(依赖)
sudo apt install -y net-tools

# 从阿里镜像站下载deb安装包到本地
curl -o jenkins.deb https://mirrors.aliyun.com/jenkins/debian/jenkins_2.457_all.deb
# 本地安装
sudo dpkg -i jenkins.deb

# 查看 jenkins 版本
jenkins --version
CentOS 安装 Jenkins
# 安装 java17
yum install java-17-openjdk
# 查看 java 版本
java -version

# 从阿里镜像站下载rpm安装包到本地
curl -o jenkins.rpm https://mirrors.aliyun.com/jenkins/redhat/jenkins-2.457-1.1.noarch.rpm
# 本地安装
yum install jenkins.rpm

# 查看 jenkins 版本
jenkins --version
服务器启动 Jenkins,默认端口 8080
# 开启服务
systemctl start jenkins
# 开机自启动
systemctl enable jenkins

# 防火墙开启 8080 端口
firewall-cmd --add-port=8080/tcp --permanent --zone=public
# 更新并查看端口
firewall-cmd --reload && firewall-cmd --list-ports
本地访问服务器 8080 端口服务 http://jenkins.yuhuo.online:8080,根据页面提示解锁 Jenkins。
Jenkins 插件源在国外,安装速度慢,容易失败,更改服务器配置如下:
# 插件源替换成清华镜像源
sed -i 's/http:\/\/updates.jenkins-ci.org\/download/https:\/\/mirrors.tuna.tsinghua.edu.cn\/jenkins/g' /var/lib/jenkins/updates/default.json

# google 替换为 baidu
sed -i 's/http:\/\/www.google.com/https:\/\/www.baidu.com/g' /var/lib/jenkins/updates/default.json
回到页面,安装推荐的插件即可。之后创建管理员用户,成功访问 Jenkins 主页。
反向代理
Jenkins 服务默认是 HTTP + 8080 端口,而我们希望使用 HTTPS + 443 默认端口来访问。没查到在 Jenkins 中怎么配置(网上的方案试了不成功),故通过 Nginx 反向代理 实现。
参考 Jenkins 提供的配置示例修改 /etc/nginx/nginx.conf:
worker_processes  1;

events {
    worker_connections  1024;
}

http {
    include       mime.types;
    default_type  application/octet-stream;

    sendfile        on;
    keepalive_timeout  65;

    upstream jenkins {
        keepalive 32; # keepalive connections
        server 127.0.0.1:8080; # jenkins ip and port
    }

    # Required for Jenkins websocket agents
    map $http_upgrade $connection_upgrade {
        default upgrade;
        '' close;
    }

    server {
        listen          443 ssl;
        server_name     jenkins.yuhuo.online;

        ssl_certificate      /etc/ssl/jenkins.yuhuo.online.pem;
        ssl_certificate_key  /etc/ssl/jenkins.yuhuo.online.key;
        ssl_session_cache    shared:SSL:1m;
        ssl_session_timeout  5m;
        ssl_ciphers  HIGH:!aNULL:!MD5;
        ssl_prefer_server_ciphers  on;

        # this is the jenkins web root directory
        # (mentioned in the output of "systemctl cat jenkins")
        root            /var/run/jenkins/war/;

        access_log      /var/log/nginx/jenkins.access.log;
        error_log       /var/log/nginx/jenkins.error.log;

        # pass through headers from Jenkins that Nginx considers invalid
        ignore_invalid_headers off;

        location ~ "^/static/[0-9a-fA-F]{8}\/(.*)$" {
            # rewrite all static files into requests to the root
            # E.g /static/12345678/css/something.css will become /css/something.css
            rewrite "^/static/[0-9a-fA-F]{8}\/(.*)" /$1 last;
        }

        location /userContent {
            # have nginx handle all the static requests to userContent folder
            # note : This is the $JENKINS_HOME dir
            root /var/lib/jenkins/;
            if (!-f $request_filename){
                # this file does not exist, might be a directory or a /**view** url
                rewrite (.*) /$1 last;
                break;
            }
            sendfile on;
        }

        location / {
            sendfile off;
            proxy_pass         http://jenkins;
            proxy_redirect     default;
            proxy_http_version 1.1;

            # Required for Jenkins websocket agents
            proxy_set_header   Connection        $connection_upgrade;
            proxy_set_header   Upgrade           $http_upgrade;

            proxy_set_header   X-Real-IP         $remote_addr;
            proxy_set_header   Host              $http_host;
            proxy_set_header   X-Forwarded-Host  $http_host;
            proxy_set_header   X-Forwarded-Port  $server_port;
            proxy_set_header   X-Forwarded-For   $proxy_add_x_forwarded_for;
            proxy_set_header   X-Forwarded-Proto $scheme;

            proxy_max_temp_file_size 0;

            #this is the maximum upload size
            client_max_body_size       10m;
            client_body_buffer_size    128k;

            proxy_connect_timeout      90;
            proxy_send_timeout         90;
            proxy_read_timeout         90;
            proxy_request_buffering    off; # Required for HTTP CLI commands
        }
    }
}
授予 Nginx 读取 Jenkins Web 根文件夹的权限
# 将 nginx 用户添加到 jenkins 组
usermod -aG jenkins nginx

# 如果没有 nginx 用户,则尝试将 www-data 用户添加到 jenkins 组
usermod -aG jenkins www-data
修改防火墙端口,启动 nginx
# 开启 443 端口,关闭 8080 端口
firewall-cmd --add-port=443/tcp --permanent --zone=public
firewall-cmd --remove-port=8080/tcp --permanent --zone=public
# 更新并查看端口
firewall-cmd --reload && firewall-cmd --list-ports

# 启动 nginx
systemctl start nginx
本地访问 https://jenkins.yuhuo.online,发现 Jenkins 页面无法正常打开(在 CentOS 中出现),查看 Nginx 错误日志:
cat /var/log/nginx/error.log

2024/05/07 22:45:11 [crit] 1947#1947: *285 connect() to 127.0.0.1:8080 failed (13: Permission denied) while connecting to upstream, client: 192.168.137.1, server: _, request: "POST /widget/BuildQueueWidget/ajax HTTP/2.0", upstream: "http://127.0.0.1:8080/widget/BuildQueueWidget/ajax", host: "jenkins.yuhuo.online", referrer: "https://jenkins.yuhuo.online/"
可以看到 Nginx 连接 127.0.0.1:8080 失败,查询后应该是 SeLinux 导致的。SeLinux 是进程层面管控文件系统资源访问的一种安全机制,Ubuntu 中默认没有安装,所以 Ubuntu 中没有报错。
两种解决方案:
关闭 SeLinux
# 查看 SeLinux 状态:Enforcing 开启,Permissive 关闭
getenforce

# 将 SeLinux 状态设为 Permissive
# 0 对应 Permissive,1 对应 Enforcing
setenforce 0
在 SeLinux 中开启 httpd 网络访问权限
# 查看 httpd 网络访问权限,看是不是 off
getsebool -a | grep httpd_can_network_connect

# 将 httpd 网络访问权限改为 on
setsebool -P httpd_can_network_connect 1
本地成功访问 https://jenkins.yuhuo.online,但是打开 Manage Jenkins,会提示反向代理设置错误,并且控制台报错,报错信息显示某些链接依然是以 http://jenkins.yuhuo.online:8080 为头去访问的。
打开 Manage Jenkins - System Configuration - System - Jenkins Location,将 Jenkins URL 设为 https://jenkins.yuhuo.online/(安装的时候设置的是 http://jenkins.yuhuo.online:8080)。
刷新页面错误消失,至此反向代理设置完成。
构建准备
服务器安装 git
# 安装 git
yum install git
# 验证 git 安装成功
git version
服务器生成 SSH 私钥文件 id_rsa 和对应的公钥文件 id_rsa.pub,默认放在 ~/.ssh/ 目录。
# 放在默认位置,一路回车即可
ssh-keygen -t rsa -C "1156159890@qq.com"
在 Gitee 设置 - 安全设置 - SSH公钥 中进行配置公钥。
# 拷贝公钥
cat ~/.ssh/id_rsa.pub
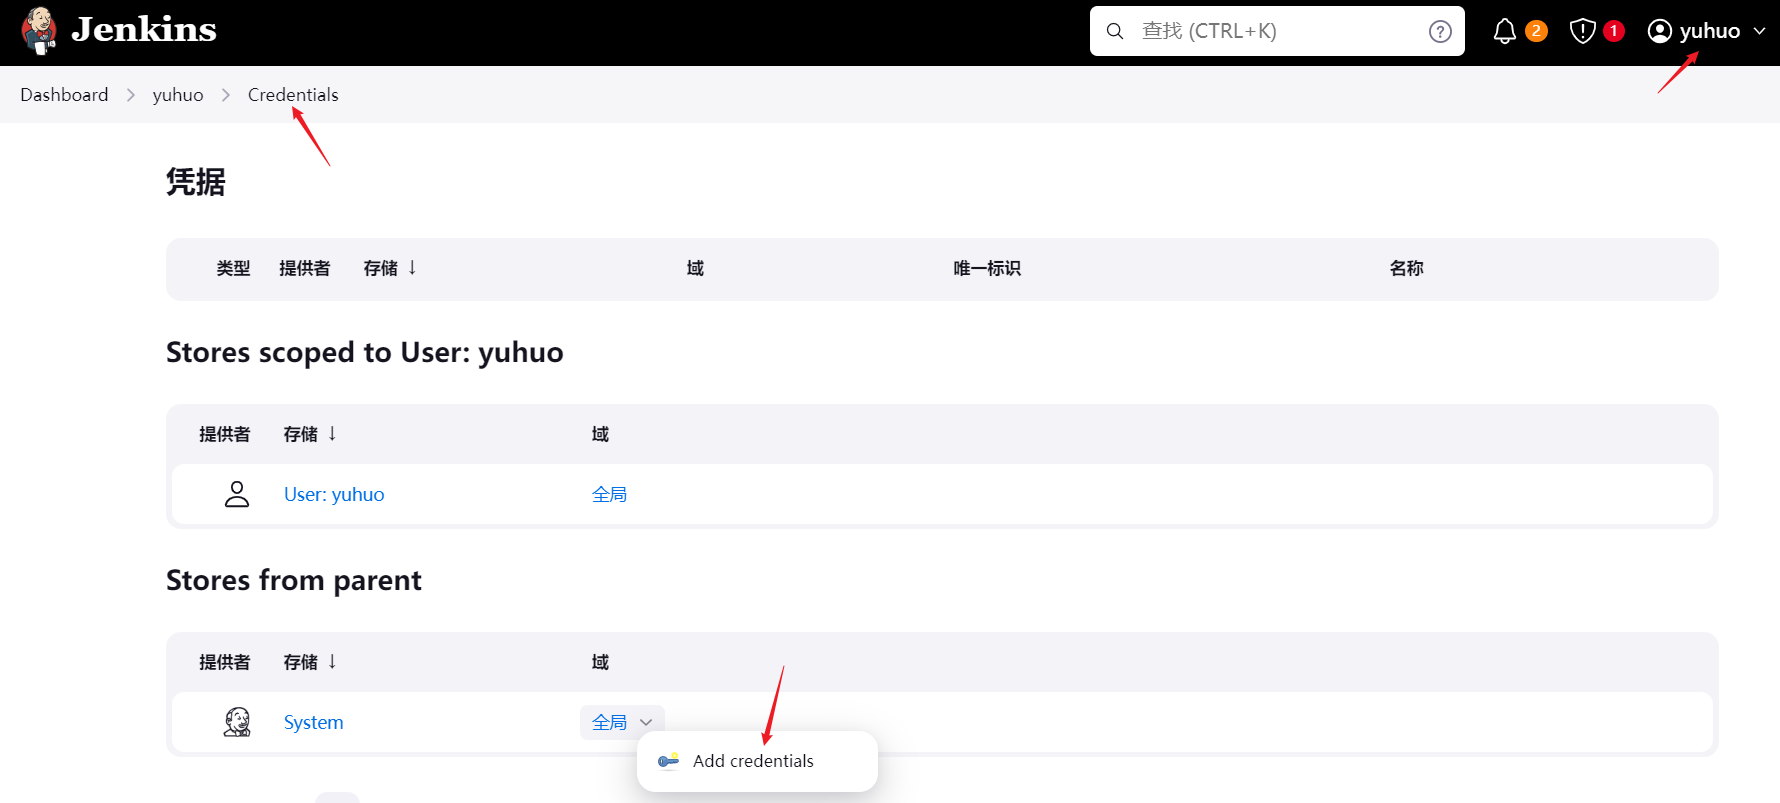
打开 Jenkins 主页 - 右上角用户名 - Credentials,添加全局凭证

类型选择 SSH Username with private key,Private Key 勾选 Enter directly,添加私钥对应输入框。其他字段默认不动,创建成功后可以看到多了一条名为 jenkins 的凭证。
# 拷贝公钥(包含开头的 BEGIN RSA PRIVATE KEY 和结尾的 END RSA PRIVATE KEY)
cat ~/.ssh/id_rsa
本地用 vue 创建个演示项目 example,提交到 Gitee 上。
npm create vue
npm run dev
npm run build
构建任务
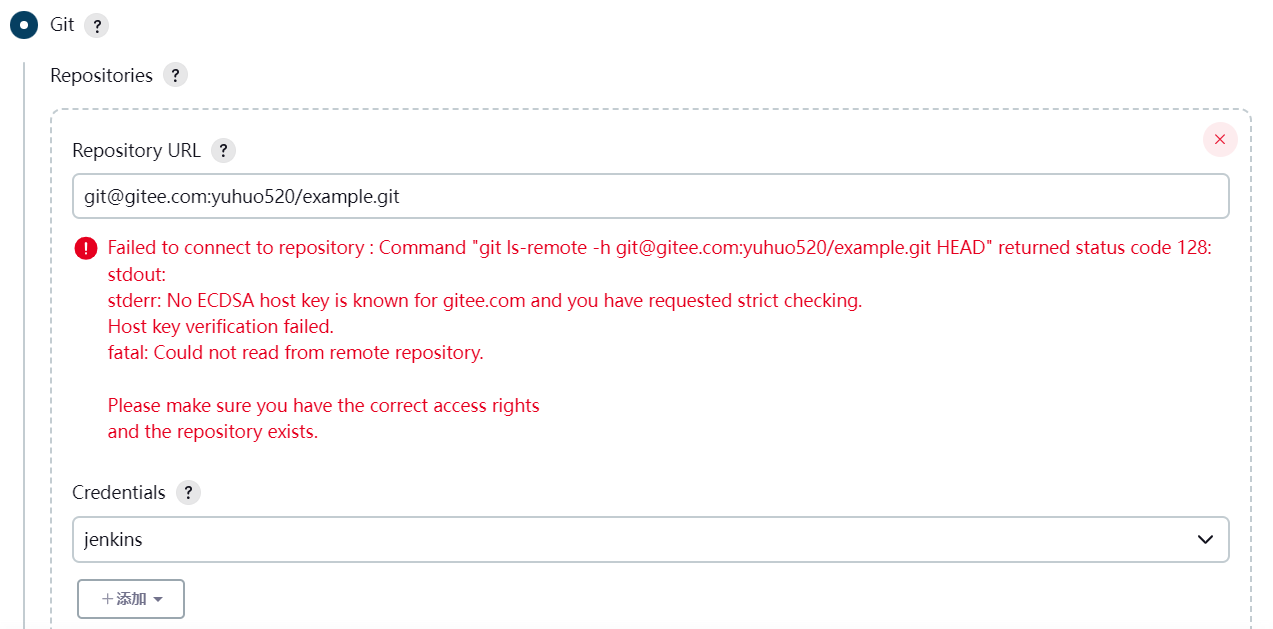
点击 新建Item,输入项目名称,选择 Freestyle project,确定后,在 General 配置 - 源码管理,勾选 Git,输入仓库的 ssh 链接并勾选凭证。

连接不成功,因为 SSH 初次连接陌生主机需要进行确认,在服务器进行如下配置。
# 拷贝报错信息中的那行命令在服务器中执行,进行确认
# 生成 ~/.ssh/known_hosts
git ls-remote -h git@gitee.com:yuhuo520/example.git HEAD

# 将 known_hosts 文件拷贝到 jenkins 用户目录下
cp ~/.ssh/known_hosts /var/lib/jenkins/.ssh/
jenkins配置https?
